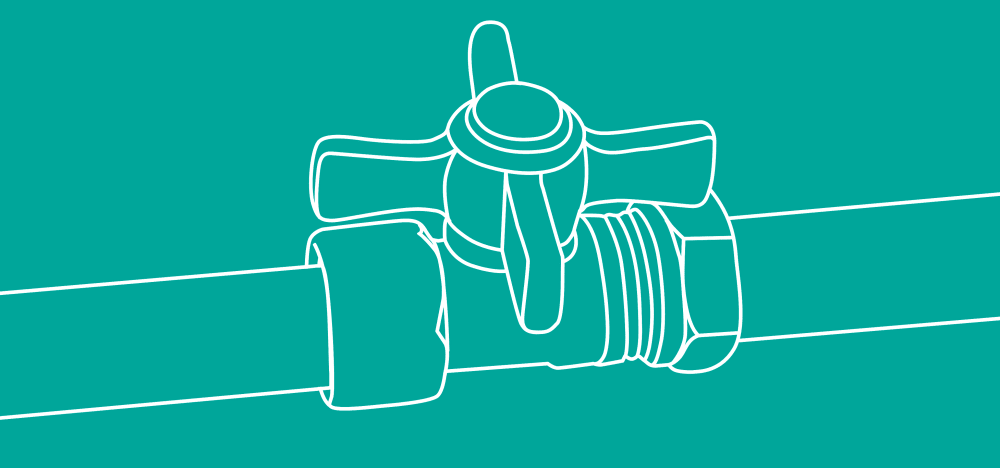
What is a Shutoff Valve?
What Every Homeowner Should Know

A Beginner’s Guide to Installing a Shutoff Valve
When you have a leaking faucet, the last thing you want is to waste water (and drive up your water bill) letting it drip loudly into a pan until you get around to fixing it, or calling in a plumber. Even worse is a broken washing machine that can flood your home. From a practical sense, it’s simple logic to conclude that you won’t be able to do repairs on pipes with water still flowing through them. So what can you do to stop the flow so repairs can be made? If you have shutoff valves installed in your home, then you already know the answer.
What Is a Shutoff Valve?
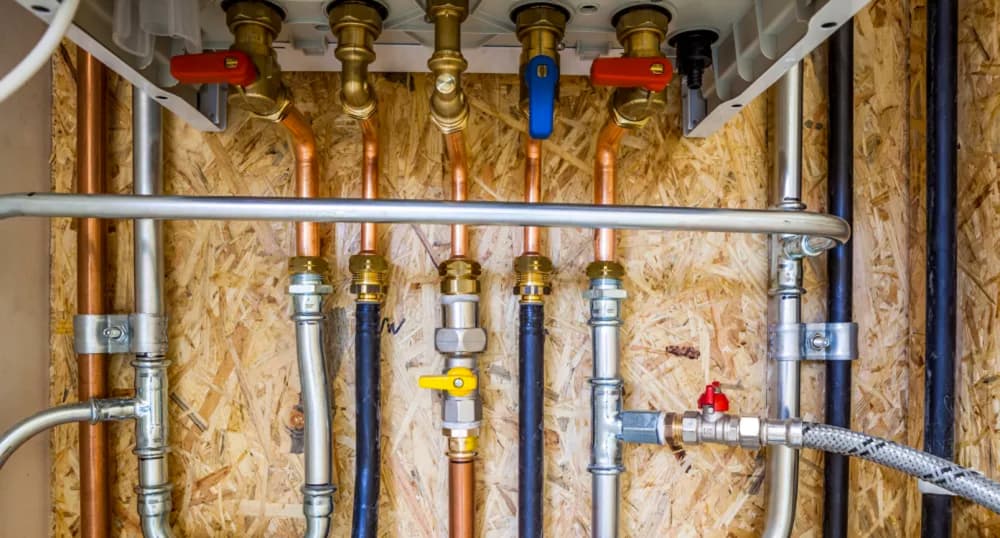
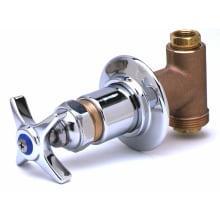
If you’re a new home owner, or you’ve been lucky enough to never have a plumbing issue, you might not be familiar with water shutoff valves. These simple valves control water flow to fixtures and appliances, like showers, toilets, sink faucets, and washing machines. They have two pipe connections: one large inlet connection in the back that connects to your main water pipe, and a smaller outlet that connects to the pipe leading to your fixture. Twisting the handle lets you turn off the water flow to your fixture, without impacting the flow through the rest of the house on that line.
Ideally every fixture has its own shutoff valve. That way you can turn off a leaky faucet for a few hours (or a few days, if needed) until it can be repaired, without losing the use of your shower or toilet by shutting off more water than necessary. These are usually located close to the fixture, for example under the sink or behind the toilet. For built in showers and tubs, they may be located behind an access panel.
In some cases you may have a single valve for an entire room, or even one for the whole house. If you only have one for your whole home, you may want to install a few valves more locally. When a plumbing problem arises, you’ll be glad you did.
Before You Begin
Now that you can answer the question ‘what is a shutoff valve?’ you still need to answer a few more questions before you can install one:
- Do you know where the main shutoff valve for the home is located?
- What are the water pipes made out of?
- How are the water pipes oriented in relation to the fixtures?
- Are you replacing an old shutoff valve or installing one in a new location?
- What kind of valve should you get?
Your answers to the questions above will set the basis for the project. You will have to do preparatory work based on these different options, such as purchasing the correct pipes and equipment, or exposing pipes in your walls or flooring. These help determine the scope of your home improvement project going forward.
Turn off Your Water
Before you do any work on your plumbing, make sure you know where the main shutoff valve for your home’s water supply is located. Once you turn off the main water supply, turn on a faucet on the lowest level of your home to drain the pipes.
The next thing to do is unscrew the water supply line from the old valve, if you’re replacing it, or the main water pipe if you’re installing a shutoff valve in a new location. Now you’re ready to work.
Removing Old Valves
If you’re replacing an old, leaky valve on copper pipes, you’ll need to figure out what type of connection it has so you can remove it. If the old valve is soldered on, you’ll need to cut the valve off by cutting through the pipe with a pipe cutter. Be sure to leave yourself enough pipe remaining between the wall and the end of the pipe to install the new valve. (As with all home improvement projects, these kinds of tasks require knowledge and skill that can seem risky without prior practice; if cutting the pipe seems like something a little more permanent than you’re prepared to experiment with on your own home, don’t hesitate to call a professional.)
If it’s a compression valve, hold the valve with a pipe wrench while you use a wrench to unscrew the nut. Once it’s unscrewed, the old valve will slide off. The nut and ferrule that held it in place can be reused with a new compression valve, but that runs the risk of any existing leaks continuing with the new valve.
The easiest way to remove the ferrule and nut from the pipe is with a tool called a sleeve puller, which screws onto the pipe exactly as the valve would, and then pulls the ring and nut off the pipe with a few turns of a wrench. You can also remove the old ferrule with a pair of wrenches by prying it off the pipe, which is just as effective, but may take a bit more work. Either way, you are left with a length of pipe ready for a new valve.
Selecting a New Shutoff Valve
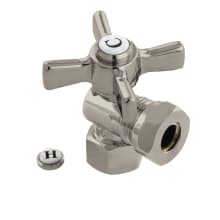
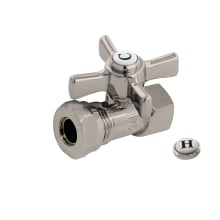
Once you answer the question, ‘what is a shutoff valve?’ the second question is ‘what kind of valve do I need?’ The best types are quarter-turn shutoff valves, as these shut off with a single quarter turn. That way, if you’re having a plumbing emergency (such as flooding) you can cut the water supply quickly and easily. Besides being a quarter-turn valve, it must fit the type of pipes you have and connect easily to the supply line by having an outflow connection in the correct orientation. If you’re replacing an old valve, you may just want to replace the kind you have.
If you have copper pipes you can use a compression valve, which will connect to your pipe with a brass ferrule and a nut. It can be installed with some pliers and a wrench, so it’s usually an easier option than a sweat valve, which needs to be soldered to your copper pipe with special soldering tools. Iron pipes are often threaded, so you’ll want to get a screw on valve. PEX and PVC pipes require valves designed specifically for them.
The push-fit valve can be slightly more expensive but also easier to work with. These fit every type of pipe and require no tools for installation. As the name implies, a push-fit valve pushes on to the end of the pipe and a built-in gasket fits snug around the pipe to hold it in place. They are only slightly more complicated to remove than to install, and require a little extra space between the valve and the wall than a compression valve might, but are easy to work with and a solid option for most plumbing jobs.
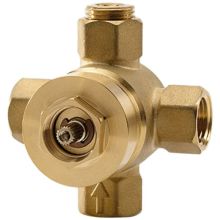
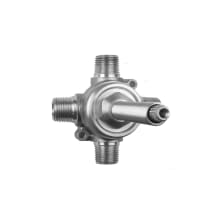
The arrangement of your water pipes and your fixture will determine whether you need a valve with the inlet and outlet connection in a straight line or at a 90 degree angle to each other. If you’re installing one for your kitchen sink, you may want a three-way valve, which has outlets to your kitchen sink and your dishwasher. Be sure to consider where you’re installing the pipe and plan ahead for the different fittings that might be needed.
Installation
Your main water valve has been shut off, your pipes drained, and you’ve picked up a new valve so you’re ready to begin. Make sure you have all the tools you’ll need handy. Depending on whether you’re removing and installing or just installing, and the type of connection you’re installing, you may need: a pipe wrench, wrench, pliers, pipe cutter, and/or a ferrule puller.
Once you have removed the old valve, installing the new one will seem like a familiar process. Attach the new valve to the pipe and (depending on the type of valve you chose, of course) use the wrench to be sure it is seated correctly and securely.
Once the valve is in place, reattach the supply line. Check that the fittings are snug with the help of a wrench, then turn your main water valve back on. Turn on a faucet to get air out of the pipes and get water flowing normally again. Check your newly installed valve to make sure it works and test it for any leaks. Finally, once everything is in working order, congratulate yourself for a job well done.
Installing a new shutoff valve can seem like a daunting project, especially if you’re asking yourself ‘what is a shutoff valve?’ But even a complete beginner can get this job done with a little planning and forethought.
Shop Products